Agenda - Calendar View
Introduction
All of your Appointments, Assignments, Attendance records,
Chores and Day Off entries are stored in the Agenda and can be viewed in the List view and Calendar view. This Help Page
deals exclusively with the Agenda - Calendar View. See the Agenda - List View Help Page for details on that area of the program.
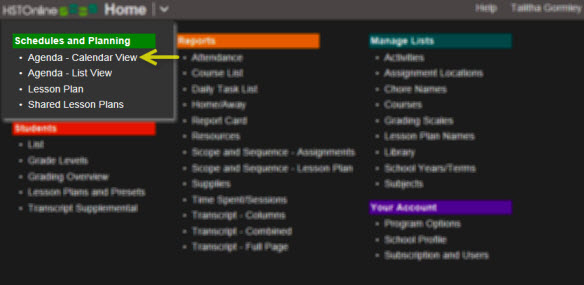 HSTOnline Menu - Agenda-Calendar View
You will use the Agenda - Calendar View filters to determine which Student and Date you want to view. The Types, Completion Status, and Subject/Course filter settings are shared between
the List View and the Calendar View.
The primary purpose of the Agenda - Calendar View is to provide a way of looking at your created items in a day, week, or month calendar format. It is best to use the Agenda - List view to perform various
actions on your Assignments, Chores and other items such as copying, multi-editing, deleting, rescheduling, etc. However, you can add new items, and edit or delete existing items one at a time, and mark
Assignments and/or Chores as complete one at a time, from the Calendar View if you wish. Further details on these actions are detailed below.
Viewing Items in Agenda - Calendar View
In the Agenda - Calendar View, you can view any one or more of the different item types for any one or more Students at a time for a Day, a Week or a Month. You can move back and forth between views as needed.
The single date you select on the calendar will determine which day, week or month is displayed. The header will show what month/year you are viewing at any time.
Agenda - Calendar View Controls
|
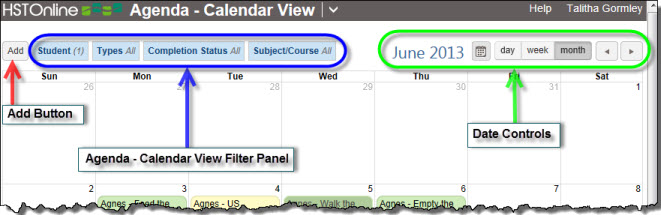 Agenda - Calendar View Controls
- Add Button:
- Filter Panel: Use the Students, Type, Completion Status and Subject/Course filters to determine which items will be displayed in the Agenda - List View. Please see
the below for complete details.
- Date Controls: Use the Date Controls to select a date, choose a view, and/or to move forward or backward in time
- Click or touch the Calendar icon to select a date. Today's date is always listed at the bottom of the calendar, and you can click or
touch on it to quickly move back to today"
- Click or touch the Day, Week or Month button to change your view. You will be taken to the Day, Week or Month that contains the date you selected in the calendar.
- Click or touch the left or right arrow buttons to move backward or forward a day, week, or a month in time - depending on which view you have currently active.
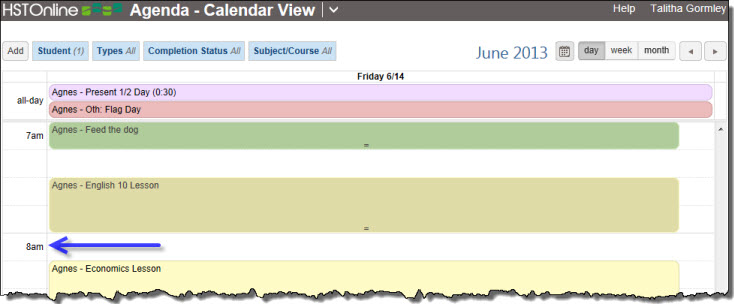
- Day: View the items for any one date of your choosing. Click or touch the 'Day' button to choose this view. Use the Calendar icon to select a date. Use the
left or right arrow buttons to move backward or forward by a day. The 'all-day' area will expand as much as necessary to accommodate the number of items designated as 'all-day'.
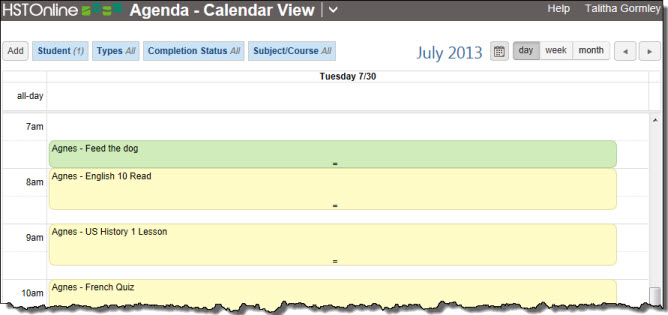 Day View
- Week: View the items for any week, Sunday to Saturday. Click or touch the 'Week' button to choose this view. Use the Calendar icon to select a date, and
HSTOnline will display the week that contains the selected date. Use the left or right arrow buttons to move backward or forward by a week. The 'all-day' area will expand as much
as necessary to accommodate the number of items designated as 'all-day'.
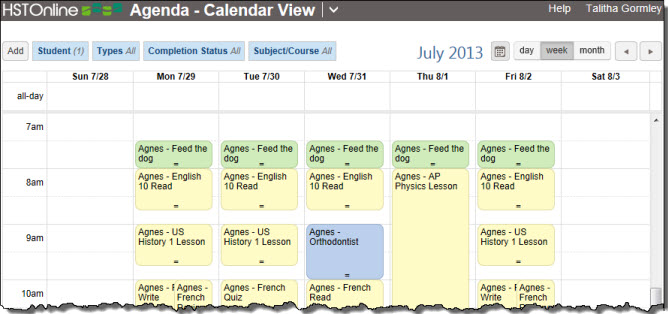 Week View
- Month: View the items for any month. Click or touch the 'Month' button to choose this view. Use the Calendar icon to select a date, and HSTOnline
will display the month that contains the selected date. Use the left or right arrow buttons to move backward or forward by a week. Each week sill expand as much as necessary to
accommodate the number of items on each date.
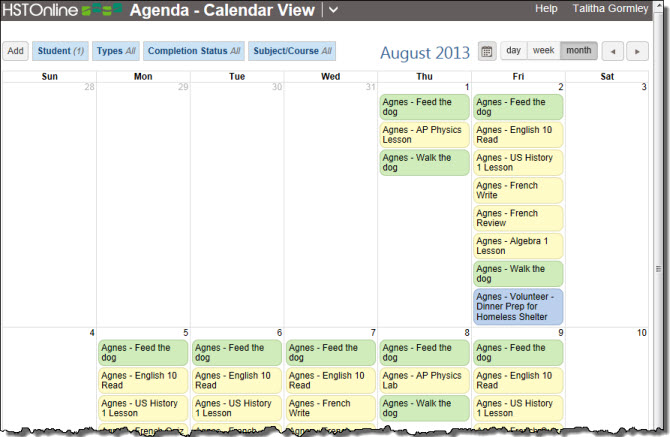 Month View
|
Time vs. Block
You can choose to have your Agenda - Calendar View display Time or Blocks in the left column. Make your selection in the Program Options: Agenda menu.
- When using Time, each Assignment, Appointment or Chore you create can be slotted into a specific time frame.
- When using Blocks, each Assignment, Appointment or Chore you create can be tied to a particular Block - from 1 to 20 - in the day. The Block option works best
for those who would like to designate a particular order in which Assignments, Appointments and Chores should be completed, but who do not want to be tied to specific times of day. See the
Blocks vs. Start/End Times Help Page for more information.

- All Day Items in Agenda - Calendar View: Attendance and Day Off entries have no specified Start/End Times or Blocks and therefore fall into the 'all day'
section at the top of the date column. Appointments, Assignments and Chores which have no specified Start/End Times or Blocks will also appear in the 'all day' section.
|
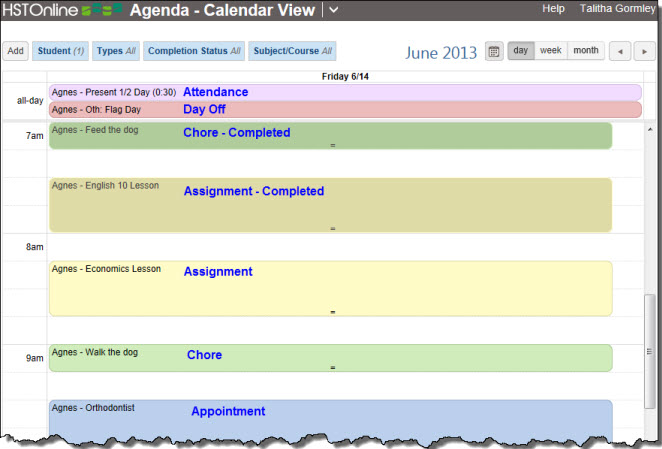
Background Colors in the Agenda - Calendar View
In the Agenda - Calendar view, items are given a background color according to their type. The color will also appear in the top line of the tool tip window that opens to show you
more about an item you have clicked on in the Agenda - Calendar view. Completed Assignments have a slightly darker background than incomplete Assignments; completed Chores have a slightly darker background
than incomplete Chores.
In Program Options: Agenda you can choose to use these same colors as the background color for the Type column to help you visually differentiate between
the different items in your list.
 The Agenda - Calendar View
Setting the Agenda - Calendar View Filters
In the Agenda - Calendar View you can view Appointments, Assignments, Attendance, Chores and Day Off entries for one Student at a time for a day, week or month of your choosing. While there will be times
when you want to see all those things at once, there are other times when you'll want to concentrate on certain items. The Filter options help you do just that.
Make your selections for each filter setting and HSTOnline will remember those settings until you change them. You can change your filter settings at any time to change which items are visible. The
Student, Types, Completion Status and Subject/Course filters are shared between the
Agenda - Calendar View and the Agenda - List View. The Date filters are specific to each of the Agenda views.
 Agenda - Calendar View Filters Panel
Skip to:
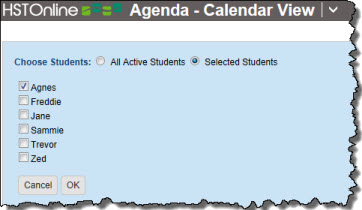
The Students Filter
In the Student filter, select the Students whose items you want to view at this time. In the Agenda - Calendar View you can view items for just one Student,
multiple Students, or All Students at a time for any Day, Week or Month of your choosing.
 Agenda - Calendar View Students Filter
- On the HSTOnline menu, click or touch 'Agenda - Calendar View' under the 'Schedules and Planning' section.
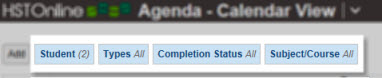
- On the Agenda - Calendar View page, click or touch Students in the filter panel. The filter will display 'All' if all Students are included in the view, or it will display
the number of Students being viewed if you have selected fewer than all Students in the filter.
- Subsequent visits will remember your prior settings for the filter.
- Click or touch the checkbox for each Student you want to include in the view.
- Any items which meet your Date Range, Types, Completion Status and Subject/Course filters will be displayed for the Students you have selected.
- Click or touch:
- Cancel to return to the prior Student selection.
- Ok to update the Student filter your new selections.
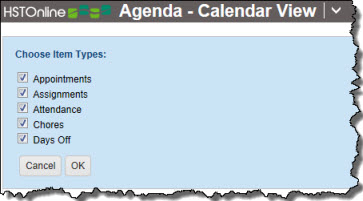
The Types Filter
Use the Types filter to choose which kinds of items are displayed for the Date Range, Student, Completion Status and Subject/Course filters you have set. You can choose one or more of the following:
Appointments, Assignments, Attendance,
Chores and/or Days Off.
The settings of the Types filter are shared between the Agenda - Calendar View and Agenda - List View. If you change the Type filter in the
Agenda - Calendar View, the Type filter will be changed in the Agenda - List View and vice versa.
 Agenda - Calendar View Types Filter
- On the HSTOnline menu, click or touch Agenda - Calendar View under the 'Schedules and Planning' section.
- On the Agenda - Calendar View page, click or touch Types in the filter panel. The filter will display 'All' if all item types are selected. It will show a number to
indicate the number of different types selected if fewer than all 5 types are checked.
- The first time you visit the Agenda - List View, the Types filter will be set to show all item types.
- Subsequent visits will remember your prior settings for the filter.
- Click or touch the checkbox next to any item type to add a checkmark (to view that item type) or to remove a checkmark (to hide that item type).
- Click or touch:
- Cancel to return to the prior Types selection.
- Ok to update the Types filter your new selections.
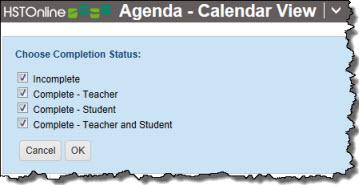
The Completion Status Filter
Use the Completion Status filter to choose which types of items are displayed for the Date Range, Student, Types and Subject/Course filters you have set. You can choose one or more of the following:
- Incomplete: Items which have a check in neither the Teacher nor the Student box
- Complete - Teacher: Items which have a check in the Complete - Teacher box but not in the Complete - Student box
- Complete - Student: Items which have a check in the Complete - Student box but not in the Complete - Teacher box
- Complete - Teacher and Student: Items which have a check in the Complete - Teacher and Complete - Student boxes
If the Complete by Student field has been disabled, the only options in the filter will be 'Incomplete' and 'Complete - Teacher'.
The settings of the Completion Status filter are shared between the Agenda - Calendar View and Agenda - List View. If you change the Completion Status
filter in the Agenda - Calendar View, the Completion Status filter will be changed in the Agenda - List View and vice versa. Completion Status only affects Assignments and Chores as these are the only two
of the five items types which can be marked as completed.
 Agenda - Calendar View Completion Status Filter
- On the HSTOnline menu, click or touch 'Agenda - Calendar View' under the 'Schedules and Planning' section.
- On the Agenda - Calendar View page, click or touch Completion Status in the filter panel. The filter will display the current settings you are viewing.
- The first time you visit the Agenda - Calendar View, the Completion Status filter will be set to the 'All Active Students' option.
- Subsequent visits will remember your prior settings for the filter.
- Click or touch the checkbox next to any item completion status to add a checkmark (to view items with that status) or to remove a checkmark (to hide items with that status) in the Agenda - List View.
- Incomplete: Items which have no checkmark in the Teacher or Student Complete box will be included in the display.
- Complete - Teacher: Items which have a checkmark in the Teacher Complete bos but not in the Student box (or if the Student Complete field is hidden) will be
included in the display.
- Complete - Student: This option will only appear if you have enabled the 'Complete by Student' field in the Optional Fields section of the
Program Options. Items which have a checkmark in the Student Complete box but not in the Teacher Complete box will be included in the display.
- Complete - Teacher and Student: This option will only appear if you have enabled the 'Complete by Student' field in the Optional Fields section of the
Program Options. When you select this option, items which have a checkmark in the Teacher Complete box and the Student Complete box will be
included in the display.
- If you have selected fewer than all of the options, those number of Completion Status settings selected will be displayed on the filter panel.
- Click or touch:
- Cancel to return to the prior Completion Status selections.
- Ok to update the Completion Status filter your new selections.
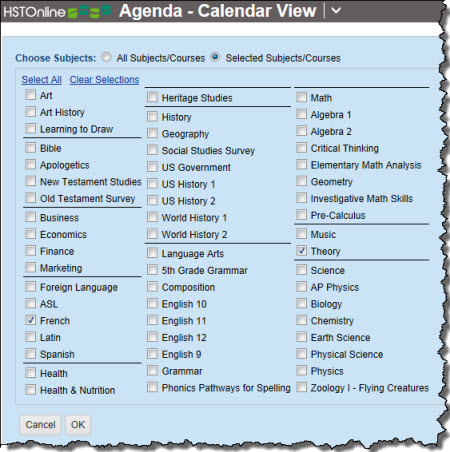
The Subject/Course Filter
Use the Subject/Course filter to determine which Assignments will be displayed for the Date Range, Student, and Completion Status filters you have set. The Subject/Course filter affects only
Assignments as they are the only item type which can have a Subject/Course affiliation.
The settings of the Subject/Course filter are shared between the Agenda - Calendar View and Agenda - List View. If you change the Subject/Course filter
in the Agenda - Calendar View, the Subject/Course filter will be changed in the Agenda - List View and vice versa.
 Agenda - List View Subject/Course Filter
- On the HSTOnline menu, click or touch 'Agenda - Calendar View' under the 'Schedules and Planning' section.
- On the Agenda - Calendar View page, click or touch Subject/Course in the filter panel. The filter will display the current settings you are viewing.
- The first time you visit the Agenda - Calendar View, the Student Filter will be set to the 'All Subjects/Courses' option.
- Subsequent visits will remember your prior settings for the filter.
- Click or touch one of the radio buttons.
- All Subjects/Courses:
- Any Assignments which meet your Date Range, Student, and Completion Status filters will be displayed for all Subjects/Courses in your
database.
- Selected Subjects/Courses:
- A list of all your active Subjects and Courses will appear, with sections between Subjects divided by a black line.
- The first entry in each section will show the name of a Subject (listed in alphabetical order) followed by any active Courses within that Subject.
- When you click or touch the checkbox next to a Subject name to add a checkmark, a check will automatically be entered for each of the Courses belonging to that Subject as well.
- Clicking or touching to remove a checkmark next to a Subject will only remove that single checkmark, excluding any Assignments that have that Subject attached but not related Courses.
- Click or touch the 'Clear Selections' link in the top left of the Subject/Course filter to remove all checkmarks at once and start again.
- In the example pictured above, only the Courses of French (under Foreign Language) and Theory (under Music) are checked. That means that the only Assignments that will be included in
the display are those which are attached to:
- Subject/Course: Foreign Language/French
- Subject/Course: Music/Theory
- Click or touch:
- Cancel to return to the prior Subject/Course selection.
- Ok to update the Subject/Course filter your new selections.
When you click or touch on any item in the Agenda - Calendar View, a Tool Tip window will open giving you additional information and options for that item. The size of the window will adjust to the content
it contains. Click or touch the 'x' in the top right corner of a Tool Tip to close it, or click or touch on another item in the Calendar to open switch from the current tool tip to another. You can drag an
open Tool Tip to a different location on the window if you like.
Skip to:
Appointments
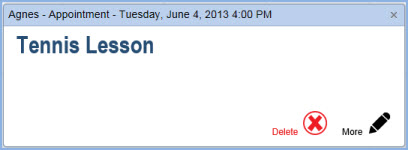 Agenda Tool Tip - Appointment
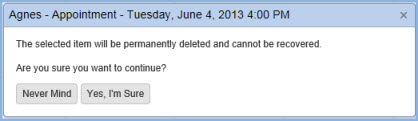 Agenda Tool Tip - Delete Appointment
- The tool tip banner is blue and shows the item type and date. If the item has a specified start time or a specified block other than zero, that information will also appear in the banner.
- The body will show the Event name.
- The available action icons are:
- Delete: only appears when signed in under an Administrator or Teacher account. Click or touch 'Delete' or the red 'X' next to 'Delete' to open the Confirm Delete
window. Click or touch 'Never Mind' to keep the item; click or touch 'Yes, I'm Sure' to remove the Appointment from your database.
Deleted items cannot be retrieved.
- More: opens the Edit Appointment window to show additional information and allow editing according to the user
account permissions.
Assignments
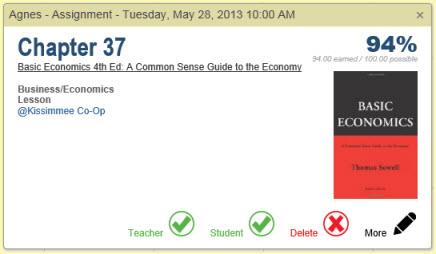
- The tool tip banner is yellow and shows item type and date. If the item has a specified start time or a specified block other than zero, that information will also appear in the banner.
- The body will show the following information. If one of these fields is blank or disabled, nothing will show in its place in the tool tip window. For reference purposes, the details in the screen shot
(Fig. 1) are noted in brackets following the field description:
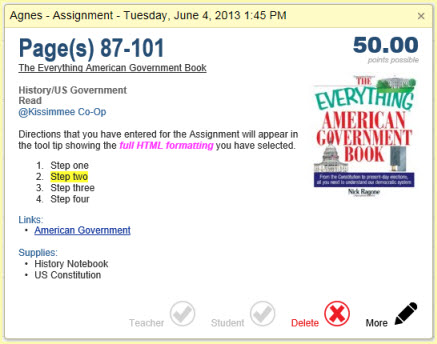 Agenda Tool Tip - Assignment (Fig. 1)
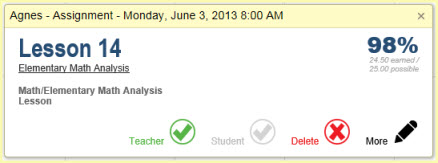 Agenda Tool Tip - Assignment Showing Grade (Fig. 2)
- Page/Lesson/Chapter: Whatever text is in the Page/Lesson/Chapter field for the assignment
[Page(s) 87-101]
- Resource: The name of the Resource, underlined [American Government]
- Subject/Course: The Subject and Course attributed to the assignment [History/US Government]
- Activity: The Activity attributed to the assignment [Read]
- Location: The location for the assignment [@Kissimmee Co-Op]
- Directions: The directions for the assignment will appear with the formatting applied in the HTML editor window. Directions will be indented from the left margin
of the tool tip window. [Directions...4. Step Four]
- Links: The links attributed to the assignment. Clicking on a link will open the destination in a new tab or window according to your browser settings.
[Homeschool Tracker Website]
- Supplies: The supplies needed for the assignment. [History notebook, US Constitution]
- Grading Information: Grading information will appear in the top right corner according to the following parameters:
- If Grading is disabled, or if there are no points possible entered for the Assignment, the top right corner will be blank
- If grading is enabled but the assignment is not marked as Complete - Teacher, the points possible will be displayed if that value is
greater than zero. [50.00]
- If grading is on and the assignment is marked as Complete - Teacher, the percentage grade will be displayed with the points earned and points possible displayed below it.
[98% - 24.50 earned/25.00 possible](Fig. 2)
- When you mark an Assignment as Complete - Teacher and the Assignment has points possible entered greater than zero, you will have an opportunity to enter the points earned (Fig. 3).
You can change the points possible and/or enter points earned in the fields provided. Click or touch Continue to have the grade calculated; click or touch
Cancel to mark as complete without entering a grade. Note - if there are points possible greater than zero, points earned of zero, and the Assignment is
marked as Complete - Teacher, the Student will receive a grade of 0%.
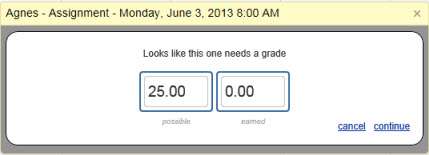 Agenda Tool Tip - Assignment Entering Grade (Fig. 3)
- The available action icons are:
- Teacher: Checkmark shows as gray when not marked as complete (Fig. 1), shows as green when marked as complete (Fig. 5). Click or touch 'Teacher' or the checkmark
next to 'Teacher' to mark the items as Complete - Teacher. If the Points Possible for the Assignment are greater than zero, you will be given the option to add Points Earned to complete the
grading process. (Fig. 3)
- Student: Only appears when the Complete by Student field is enabled. Checkmark shows as gray when not marked as
complete (Fig. 1), shows as green when marked as complete (Fig. 5). Click or touch 'Student' or the checkmark next to 'Student' to mark the item as Student Complete.
- Delete: only appears when signed in under an Administrator or Teacher account. Click or touch 'Delete' or the red X next to 'Delete' to open the Confirm Delete
window (Fig. 4). Click or touch 'Never Mind' to keep the item; click or touch 'Yes, I'm Sure' to remove the Assignment from your
database. Deleted items cannot be retrieved.
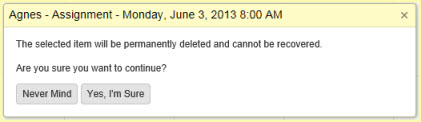 Assignment Tool Tip - Confirm Delete (Fig. 4)
- More: opens the Edit Assignment window to show additional information and allow editing according to the user
account permissions.
 Agenda Tool Tip - Assignment Completed (Fig. 5)
Attendance
 Agenda Tool Tip - Attendance
 Agenda Tool Tip - Delete Attendance
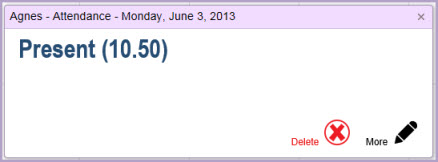
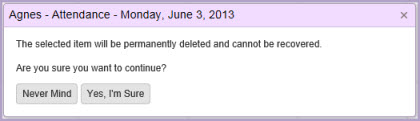
- The tool tip banner is lavender and shows item type and date.
- The body will show Present, Present 1/2 Day, or Absent,
- If you are tracking Manual Hours, Time Spent or Sessions along with Attendance, that information will be listed in parentheses following the 'Present' or 'Present 1/2 Day' entry.
- The available action icons are:
- Delete: only appears when signed in under an Administrator or Teacher account. Click or touch 'Delete' or the red 'X' next to 'Delete' to open the Confirm Delete
window. Click or touch 'Never Mind' to keep the item; click or touch 'Yes, I'm Sure' to remove the Attendance entry from your
database. Deleted items cannot be retrieved.
- More: opens the Edit Attendance window to show additional information and allow editing according to the user
account permissions.
Chores
 Agenda Tool Tip - Chore
 Agenda Tool Tip - Chore Completed
 Agenda - Tool Tip - Delete Chore
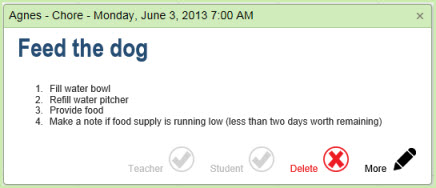
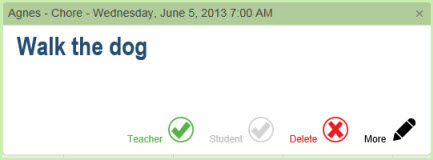
- The tool tip banner is green and shows item type and date. If the item has a specified start time or a specified block other than zero, that information will also appear in the banner.
- The body will show the Chore name and any directions entered for that chore.
- The available action icons are:
- Teacher: Checkmark shows as gray when not marked as complete, shows as green when marked as complete. Click or touch 'Teacher' or the checkmark next to 'Teacher' to
mark the items as Complete - Teacher.
- Student: Only appears when the Complete by Student field is enabled. Checkmark shows as gray when not marked as
complete, shows as green when marked as complete. Click or touch 'Student' or the checkmark next to 'Student' to mark the item as Student Complete.
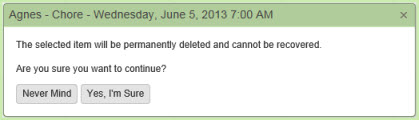
- Delete: only appears when signed in under an Administrator or Teacher account. Click or touch 'Delete' or the red 'X' next to 'Delete' to open the Confirm Delete
window. Click or touch 'Never Mind' to keep the item; click or touch 'Yes, I'm Sure' to remove the Chore from your database.
Deleted items cannot be retrieved.
- More: opens the Edit Chore window to show additional information and allow editing according to the user
account permissions.
Day Off
 Agenda Tool Tip - Day Off
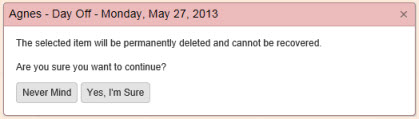 Agenda Tool Tip - Delete Day Off
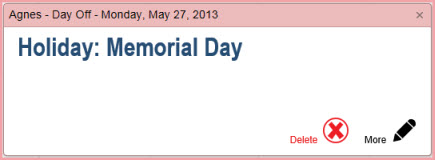
- The tool tip banner is rose and shows item type and date.
- The body will show the Day Off type and description.
- The available action icons are:
- Delete: only appears when signed in under an Administrator or Teacher account. Click or touch 'Delete' or the red 'X' next to 'Delete' to open the Confirm Delete
window. Click or touch 'Never Mind' to keep the item; click or touch 'Yes, I'm Sure' to remove the Day Off entry from your database.
Deleted items cannot be retrieved.
- More: opens the Edit Day Off window to show additional information and allow editing according to the user account
permissions.
Adding items to the Agenda - Calendar View
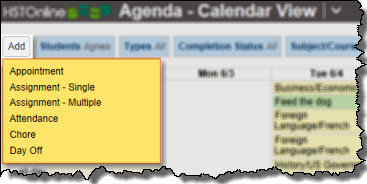 Agenda - List View Add Button
Use the options under the Add button to add any one or more new entries for Appointments, Assignments,
Attendance, Chores and/or Days Off. Adding items to
the Agenda - Calendar View will also add them to the Agenda - List View and vice versa. The two views just provide two different ways to view the same items - in list view or in a day, week or month
calendar view.
In addition to the manual entry of Attendance records using the Add: Attendance option here, you can go to Program Options: Attendance and turn on
Auto-Attendance. With Auto-Attendance enabled, HSTOnline will add an Attendance entry for a Student for any date on which there is at least one Assignment which has been marked as Teacher - Complete.
Even with Auto-Attendance enabled, you can manually enter or adjust Attendance records at any time.
In addition to the manual entry of Assignments using the Add: Assignment - Single or Add: Assignment - Multiple options here, Assignments can be added using the
Scheduler tool to create Assignments from your Lesson Plans.
Working with Agenda - Calendar View Items
The primary purpose of the Agenda - Calendar View is to provide a way of looking at your created items in a day, week, or month calendar format. It is best to use the Agenda - List view to perform various
actions on your Assignments, Chores and other items such as copying, multi-editing,
deleting, rescheduling, etc. However, you can add new items to the Agenda - Calendar View and,
one at a time, edit or delete existing items and mark Assignments and/or Chores as complete from the Calendar View if you wish.
Editing Items in the Agenda Calendar View
You can edit any single Appointment, Assignment, Attendance record, Chore or Day Off in the Agenda - Calendar view. To edit multiple items of the same type at the same time, use the
Multi-Edit action in the Agenda - List View.
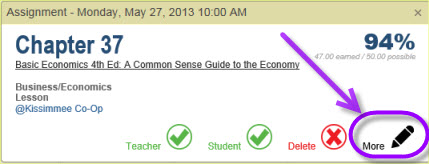 Agenda - Calendar View Tool Tip - More Button
- On the HSTOnline menu, click or touch 'Agenda - Calendar View' in the 'Schedules and Planning' box.
- Set the filters to view the item you want to change.
- Click or touch on the item you want to change to open the tool tip window.
- Click or touch 'More' to open the Edit window for that item
- Make any needed changes according to the user account permissions.
- Click or touch Save to keep your changes and return to the Agenda - Calendar View.
Drag-and-Drop Items in the Agenda - Calendar View
You can drag-and-drop items around the Agenda - Calendar view to change the date and time/block associated with the item. If you are using Auto-Attendance,
your Attendance records will be automatically updated based on your drag-and-drop changes. Days will be marked as Present, Present 1/2 Day, show changes to Time Spent or Sessions totals, or have those
notations removed based on the moving of Assignments.
Drag-and-drop is not available on touch devices. To change dates or time/block details on a touch device, you will need to utilize the edit
action, noted above. Or use the Multi-Edit action of the Agenda - List View.
Day View
- Click and drag any item to another time or into the 'all day' area.
- Moving an item into the 'all day' area will remove the start/end times or block designation from that item.
- Click and drag the item handle to lengthen the time frame of an item with start/end time or block designations.
- You cannot rearrange the order of 'all day' items with drag and drop. To change their order, edit the item and change the value in the Order field.
Week View
- Click and drag any item to another time or into the 'all day' area.
- Click and drag any item onto another date.
- Moving an item into the 'all day' area will remove the start/end times or block designation from that item.
- Click and drag the item handle to lengthen the time frame of an item with start/end time or block designations.
- You cannot rearrange the order of 'all day' items with drag and drop. To change their order, edit the item and change the value in the Order field.
Month View
- Click and drag any item to another date.
- The original start/end times, block designation, or lack thereof, will remain the same when moving items around in the month view.
Deleting Items in the Agenda Calendar View
Agenda - Calendar View Tool Tip
Confirm Delete
You can delete any single Appointment, Assignment, Attendance record, Chore or Day Off in the Agenda Calendar view. To delete multiple items of the same type at the same time, use the
Delete action in the Agenda - List View.
- On the HSTOnline menu, click or touch 'Agenda - Calendar View' in the 'Schedules and Planning' box.
- Set the filters to view the item you want to remove.
- Click or touch on the item you want to remove to open the tool tip window.
- Click or touch 'Delete' to open the Confirm Delete window for that item. The Delete option will only appear when signed in under an Administrator or Teacher account.
- Click or touch 'Never Mind' to keep the item; click or touch 'Yes, I'm Sure' to remove the Day Off entry from your database. Deleted items
cannot be retrieved.
Printing Agenda - Calendar View Items
If you give your Students access to the program with their own User account, you many not need to print a list of Assignments, Chores and Appointments for them.
However, at some point you may want to have hard-copy documentation of the actual work that has been done. Use the Daily Task List to create such a document. All
reports are generated as PDF documents which you can then print, save, email, etc. as needed.
When creating a Daily Task List, you can choose to include nay combination of Appointments; incomplete, complete or past due Assignments; and incomplete, complete or past due Chores for any date range. The
Daily Task List can be grouped by Date or by Subject/Course. See the Daily Task List Help Page for more information.