Student - Grade Levels
Skip to
Related Student Topics
Related Topics
Introduction
This Student: Grade Level area allows you to assign a specific Grade Level for the Student for each School Year you create. This is an optional feature. In addition, you can add Notes to any Grade Level which
can then be included as Progress Notes in the Report card.
You will want to add your School Year(s) first. Each School Year you create will be listed in the Grade Level page for each Student.
The Grade Level area is never available to Student Users as this area may contain Progress Notes which you are not yet ready to share with your Student.
To access the Grade Levels area, click or touch Grade Levels under the Students section of the HSTOnline menu.
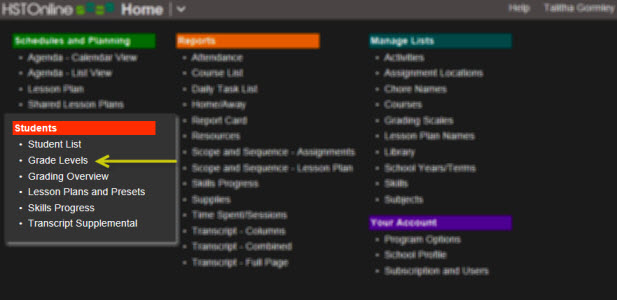 HSTOnline Menu - Student: Grade Levels
View Controls
|
- Student drop down: Select a Student from the drop down list and click or touch the Go button to view items for that Student.
|
The first time you visit this area, you will see just the Student drop down and Go button. Select a Student from the list to get started and then click Go.
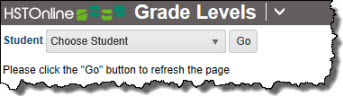 Grade Level: First Visit
Once you have selected a Student, the Grade Level list will appear. Click on any School Year to add a Grade Level and/or Progress Notes for that Student and School Year. Each time you return to this area,
HSTOnline will show you the information for the last Student selected.
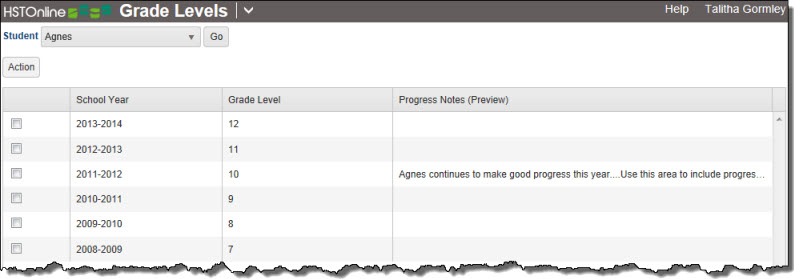 Grade Level Grid
Grade Level Controls
|
- Action Button:
- Edit: With one item selected, this action becomes available. Choose edit to add or edit Grade Level or Progress Notes information to the selected School
Year.
|
Setting a Grade Level
- On the HSTOnline menu, click or touch 'Grade Level' under the Students section.
- In the Grade Level page, select a Student in the drop down box and click the Go button. The Grade Level list will appear, showing a row for each School Year
you have created.
Grade Level List
- Double-click on the item you want to change to open the Grade Level window.
- Alternatively, you can click once on the item you want to change and then click the Action button and choose Edit to open the Grade Level window.
- On a touch device, touch the item you wish to edit and then touch the Action button and touch Edit to open the Grade Level window.
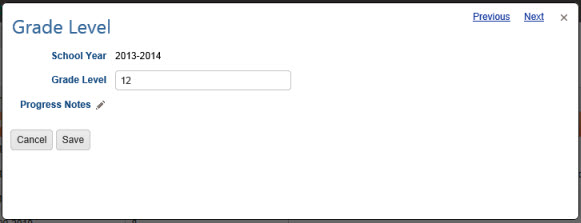
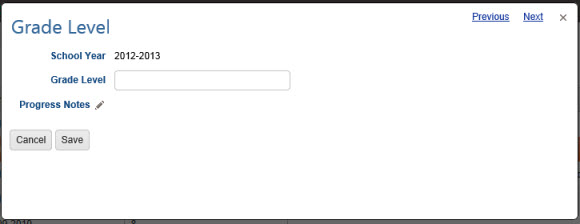 Set Grade Level
- Enter a Grade Level for the School Year, up to 15 characters.
- While in this form, you can also choose to enter Progress Notes for your Student for the School Year. Click or touch the Progress Notes hyperlink or the
pencil icon to add any notations desired.
- Click or touch:
- Cancel to abandon the changes
- Save to keep the changes and update your list
- The Previous or Next hyperlink in the top right corner to save your changes to this item and move to the previous or next item
in the list. You can click or touch Previous or Next until you have made all the changes you want and then click or touch the Save button to end the Edit process. If you reach the
beginning or end of the list when clicking or touching Previous or Next, the Edit window will close and you will be returned to the list view.
Entering Progress Notes
You can use this area to enter Progress Notes for your Student, which can then be included on a Report Card.
- On the HSTOnline menu, click or touch 'Grade Level' under the Students section.
- In the Grade Level page, select a Student in the drop down box and click the Go button. The Grade Level list will appear, showing a row for each School Year
you have created.
Grade Level List
- Double-click on the item you want to change to open the Grade Level window.
- Alternatively, you can click once on the item you want to change and then click the Action button and choose Edit to open the Grade Level window.
- On a touch device, touch the item you wish to edit and then touch the Action button and touch Edit to open the Grade Level window.
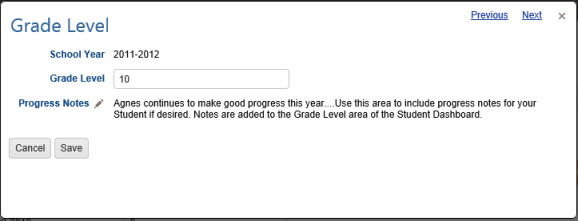
 Enter Progress Notes
- Click or touch the Progress Notes hyperlink or the pencil icon to add any notations desired.
- While in this form, you can also choose to enter a Grade Level for the School Year, up to 15 characters.
- Click or touch:
- Cancel to abandon the changes
- Save to keep the changes and update your list
- The Previous or Next hyperlink in the top right corner to save your changes to this item and move to the previous or next item
in the list. You can click or touch Previous or Next until you have made all the changes you want and then click or touch the Save button to end the Edit process. If you reach the
beginning or end of the list when clicking or touching Previous or Next, the Edit window will close and you will be returned to the list view.
Deleting an Entry
School Years cannot be deleted from this view. To delete a School Year, go to the School Years/Terms page. Instead, you can edit any row to delete
the Grade Level and/or Notes you have added previously.
- On the HSTOnline menu, click or touch 'Grade Level' under the Students section.
- In the Grade Level page, select a Student in the drop down box and click the Go button. The Grade Level list will appear, showing a row for each School Year
you have created.
Grade Level List
- Double-click on the item you want to change to open the Grade Level window.
- Alternatively, you can click once on the item you want to change and then click the Action button and choose Edit to open the Grade Level window.
- On a touch device, touch the item you wish to edit and then touch the Action button and touch Edit to open the Grade Level window.
 Change Details
- Remove whatever details you like. To delete Progress Notes, click or touch the Progress Notes link or the pencil icon. Make your changes in the Progress Notes window and click Save to return to the
Grade Level window.
- Click or touch:
- Cancel to abandon the changes
- Save to keep the changes and update your list
- The Previous or Next hyperlink in the top right corner to save your changes to this item and move to the previous or next item
in the list. You can click or touch Previous or Next until you have made all the changes you want and then click or touch the Save button to end the Edit process. If you reach the
beginning or end of the list when clicking or touching Previous or Next, the Edit window will close and you will be returned to the list view.