The Chore Names List
Introduction to Chores
Chores can be any task you desire and can be assigned to your students to appear along with their schoolwork in the Agenda and be included in the Daily Task List
of work to be done by your student. Each Chore Name consists of a Name field of up to 150 characters and an optional Instruction field where you can enter information about the Chore for your Student. This
is an optional feature of HSTOnline and you can create Chore Names or not, as desired.
To access the Chore Names list, click or touch Chore Names under the 'Manage Lists' section of the HSTOnline menu.
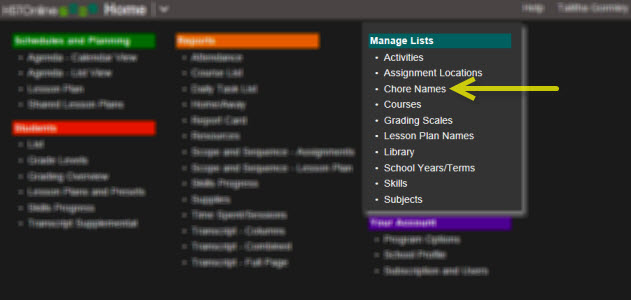 HSTOnline Menu - Chores
This Help Page details how to add, edit and delete chores which can then be assigned to Students. Please refer to the Assigning Chores page for information
on scheduling Chores for your Students.
The Chore Name field in Chore add/edit windows is a Smart-Entry field.
The Chore Names list is sorted alphabetically by the Name field. You can group or sort by either the Name or Active columns. The Active column shows a 'Y' if
the Chore is active and an 'N' if the Chore is archived.
Chore Names List Columns
| Column Name |
Notes |
Default Visibility |
| Name |
List is sorted by Name |
Visible |
| Inst (*) |
Shows '*' if Instructions have been entered for the Chore |
Hidden |
| Instructions (Preview) |
Displays, in plain text, the first 150 characters of the Chore Instructions |
Visible |
| Active |
Shows 'Y' if the Chore is active and 'N' if the Chore is archived |
Visible |
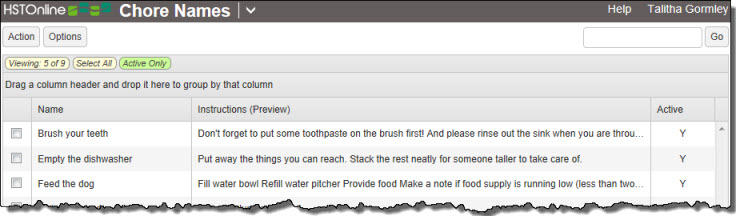 Chore Names List
Chores Names List Controls
- Action Button:
- Add: Add one or more items to the Chore Names list. This action is always available.
- Edit: With one Chore Name selected, this action becomes available. Choose edit to change the Chore Name, Instructions or Active status.
- Multi-Edit: With two or more Chore Names selected, this action becomes available. Choose this option to edit the Active status for all
selected items.
- Delete: With one or more Chore Names selected, this option becomes available. Choose this option to permanently delete the selected
items from your database.
- Options Button:
- Choose Columns: Click or touch this option to select which fields will be displayed in the Chore Names list. You must select at least one column.
- Filter: Click or touch this option to select which types of Chore Names will be displayed.
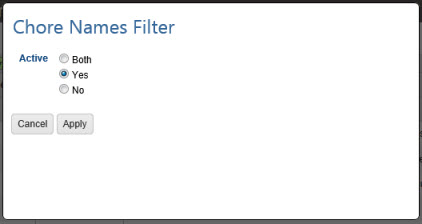 Chores Filter
In the Chore Names Filter you can view items by Active Status: Both, Yes (Active only), or No (Archived only). The default selection shows all Active Chores. When anything other than
Both is selected, the Filter Settings badge shows which types of items are being displayed.
Chores Filter
In the Chore Names Filter you can view items by Active Status: Both, Yes (Active only), or No (Archived only). The default selection shows all Active Chores. When anything other than
Both is selected, the Filter Settings badge shows which types of items are being displayed.
- Expand All: When the list is Grouped, click or touch this option to expand (open) all groupings.
- Collapse All: When the list is Grouped, click or touch this option to collapse (close) all groupings.
- Search Box and Go Button: Use the Search box to enter text and click the Go button to find Chore Names matching your entry. HSTOnline will do an exact search for whatever text you enter,
searching the Name and Instructions (Preview) columns. Only the text visible in the Instructions (Preview) will be searched. Leave the search box blank and click Go or click or touch the
Search text badge to return to the full list of Chores.
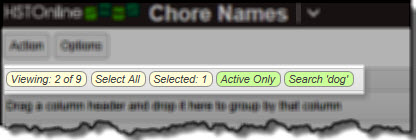
Chore Names List Badges
- Viewing: Indicates the number of Chore Names being displayed out of the total based on the current settings
- Select All: Click or touch this badge to quickly select all of the Chore Names you are currently viewing in the list.
- Selected: When one or more Chore Names are highlighted, this badge will appear to show the number of items selected. Click or touch this badge to quickly deselect
all Chore Names.
- Filter Settings: If you have limited the types of Chore Names to be displayed, the filter badge will appear showing the types of items being displayed
- either Active Only or Archived Only.
- Search text: Shows the text entered into the Search box which is limiting which Chore Names are displayed. Click or touch this badge to clear the text
from the search box and remove that limitation.
 Chore Names List Badges
Adding Chore Names
You can have as many or as few Chores as you like. For each Chore you create, you can include Instructions on how the Student is to accomplish the task. The Instructions field accepts full HTML formatting
to make it easy to create numbered or bulleted lists, bold, underline and other characteristics as needed.
- On the HSTOnline menu, click or touch Chore Names under the 'Manage Lists' section.
- On the Chore Names page, click or touch the Action button and choose Add to open the Add Chore Name window.
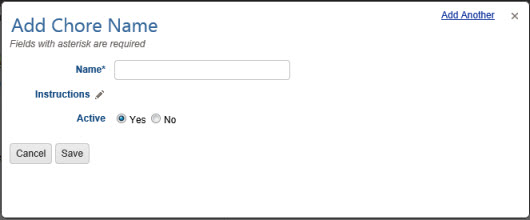 Add Chore Name
- Name: Enter a name for your Chore, up to 150 characters.
- Instructions: Click or touch the Instructions field name or the pencil icon to add instructions for the Chore. Use the HTML box
icons to add bold, underline, italics and other features to your Instructions as needed. Instructions can be included in the Daily Task List.
- Active: All new Chores start as Active. Click or touch the No radio button if you want to archive this Chore. You may change the status at any time in the future by
editing the Chore.
- Click or touch:
- Cancel to abandon the new item without adding to your list.
- Save to add this item to your list of Chore Names.
- The 'Add Another' hyperlink in the top right corner to save this item and add another. You can click 'Add Another' each time until you have entered the last new
Chore Name and then click the Save button to end the Add process.
- Click or touch the green Added Items notification or refresh the page to see your updated Chore Names list.
 Added Items Notification
Editing Chore Names
You can edit any single Chore to change the Name, Instructions or Archive status, or edit any group of selected Chores to change their Active status.
Editing a Single Chore
- On the HSTOnline menu, click or touch Chore Names under the 'Manage Lists' section.
- On the Chore Names page, double-click on the item you want to change to open the Edit Chore window.
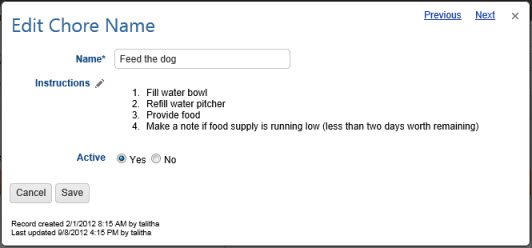 Edit Chore Name
- Alternatively, you can click once on the item you want to change and then click the Action button and choose Edit to open the Edit Chore Name window.
- On a touch device, touch the item you wish to edit and then touch the Action button and touch Edit to open the Edit Chore Name window.
- At the bottom of the edit view, you will see when and by whom the item was created as well as when and by whom it was last updated.
- Make whatever changes are needed to the Name or Instructions for the Chore.
- To change the Active status this Chore, click or touch the Yes radio button to make the Chore Active; click or touch the No radio button to Archive the Chore.
- Click or touch:
- Cancel to abandon the changes and close the Edit Chore Name window.
- Save to commit the changes to your Chore and close the Edit Chore Name window.
- Click or touch the Previous or Next hyperlink in the top right corner to save your changes to this Chore and move to the previous
or next Chore in the list. You can click or touch Previous or Next until you have made all the changes you want to your Chore Names and then click the Save button to end the Edit process.
If you reach the beginning or end of the list when clicking or touching Previous or Next, the Edit window will close and you will be returned to the list view.
Editing Multiple Chore Names
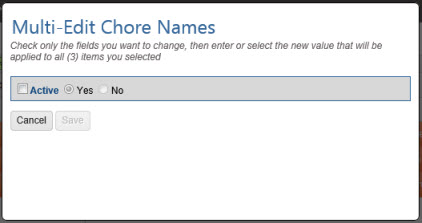 Multi-Edit Chore Names
- On the HSTOnline menu, click or touch Chore Names under the 'Manage Lists' section.
- On the Chore Names page, select the items you want to change. You can use the Grouping and Sorting, Filter and
Search features to isolate the items you want to change.
- Click the checkbox for each Chore Name you want to change.
- You can use your mouse to click and drag over contiguous Chore Names in the list to select those items.
- On a touch device, you can touch and drag your finger over contiguous Chore Names in the list to select those items.
- Click or touch the 'Select All' badge to select all the Chore Names in the list.
- Click or touch the Action button and choose Multi-Edit to open the Multi-Edit Chore Names window.
- HSTOnline will show you how many items have been selected for editing.
- When multi-editing Chore Names, only the Archive field can be changed.
- To change the Active status of the selected items, click or touch the box to the left of Active.
- To make all the selected items Active, click or touch the ‘Yes’ radio button.
- To Archive all the selected items, click or touch the ‘No’ radio button.
- Click or touch:
- Cancel to abandon the changes and close the Multi-Edit Chore Names window.
- Save to commit the changes and close the Multi-Edit Chore Names window.
Deleting Chore Names
You can delete any Chore Name or any group of selected Chore Names which have not been assigned to any Student. Chore Names which have been assigned can be removed from the active list using the
Archive feature. Deleted items cannot be retrieved.
Deleting a Single Chore
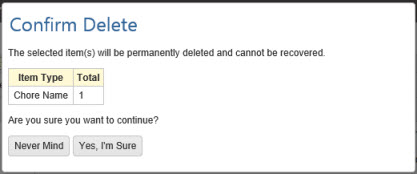 Confirm Delete
- On the HSTOnline menu, click or touch Chore Names under the 'Manage Lists' section.
- On the Chore Names page, click or touch the item you want to remove and then click the Action button and choose Delete to open the Confirm Delete window.
- Click or touch:
- 'Never Mind' to cancel the delete process.
- 'Yes, I'm Sure' to complete the deletion process.
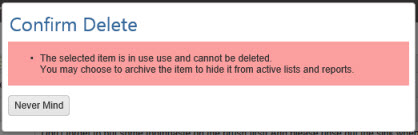
- If the Chore is assigned to a Student, you will see a message that the selected item cannot be deleted. Click or touch the
'Never Mind' button to return to the Chore Names List. From there you can choose to archive the Chore to hide it from your list.
 Delete Warning
Deleting Multiple Chore Names
 Delete Multiple Chore Names
- On the HSTOnline menu, click or touch Chore Names under the 'Manage Lists' section.
- On the Chore Names page, select the items you want to remove. You can use the Grouping and Sorting, Filter and
Search features to isolate the items you want to remove.
- Click the checkbox for each Chore you want to remove.
- You can use your mouse to click and drag over contiguous Chore Names in the list to select those items.
- On a touch device, you can touch and drag your finger over contiguous Chore Names in the list to select those items.
- Click or touch the 'Select All' badge to select all the Chore Names in the list.
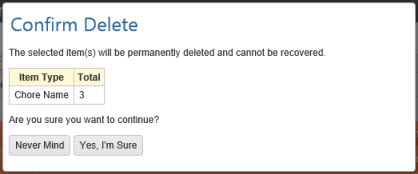
- Click or touch the Action button and click or touch Delete to open the Confirm Delete window.
- HSTOnline will show you how many items have been selected for deletion.
- Click or touch:
- 'Never Mind' to cancel the delete process.
- 'Yes, I'm Sure' to complete the deletion process. HSTOnline will delete any of the selected Chore Names which are not assigned to Students. Items that are
in use will not be deleted.
Archiving Chore Names
Archive Chore Names that you won't be using in the current School Year. Use the Edit or Mutli-Edit directions above to change the Active status of your Chore Names.